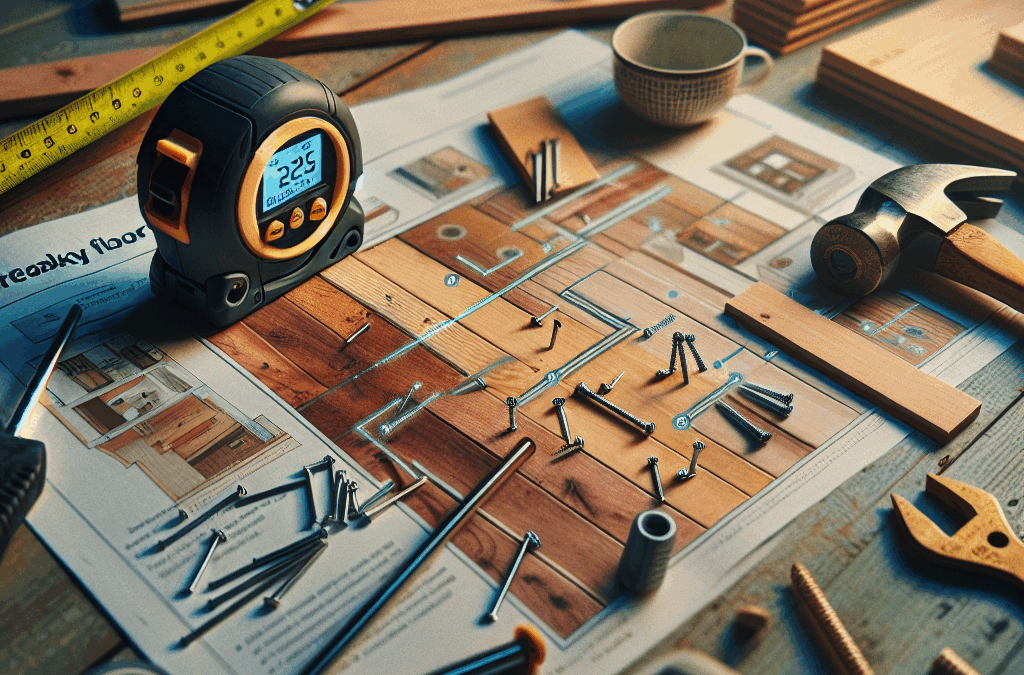
- 1. Clean and Inspect Your Floors
- 2. Tighten Loose Floor Joists
- 3. Apply Specialized Adhesives
- 4. Install Shims for Stability
- 5. Reinforce with Additional Framing
- 6. Use Floor Silicones or Lubricants
- 7. Replace Old or Worn Floorboards
- 8. Level Uneven Floors
- 9. When to Hire Professionals
- 10. Ongoing Maintenance Tips
1. Clean and Inspect Your Floors
Remove Dust and Debris
Start by thoroughly cleaning your floors to remove dust, dirt, and debris. Accumulated dirt can sometimes cause the perception of creaking by settling into joints and gaps. Use a vacuum or broom to sweep away loose particles, then mop with a mild cleaner. A clean surface makes it easier to pinpoint the exact source of creaks.
Regular cleaning also allows you to spot potential problems such as cracks or squeaky spots that worsen over time. In 2025, integrating smart home sensors can help detect unusual vibrations or noise patterns, giving you early alerts for creaky floors.
Investing in routine inspections ensures you address issues before they become costly repairs. Noticing a strange noise during daily use is often the first sign that fixing creaky floors is needed.
Inspect for Loose or Damaged Boards
Carefully examine your floorboards for loose, damaged, or cracked wood. Walk around the room gently, listening for squeaks or feeling for movement underfoot. In many cases, creaky floors are caused by loose nails or warped boards.
In 2025, using a moisture meter can help identify whether water damage has caused your flooring to warp, which can contribute to creaking. Once identified, take notes of the problematic areas for targeted fixes.
Addressing these issues early can save significant time and money. Fixing creaky floors often starts with understanding where the instability originates, making inspections a critical first step.
2. Tighten Loose Floor Joists
Identify the Loose Joists
Loose or improperly secured joists are a common culprit behind creaky floors. Use a pry bar and a flashlight to locate gaps or movement in the joist system. Often, squeaks occur when the joists rub against nails or other framing components.
In 2025, advanced imaging tools like infrared cameras can help detect hidden gaps or movement in the joist system that are not visible to the naked eye. This technology improves the accuracy and efficiency of repairs.
Once identified, you can plan to tighten or reinforce these joists. Securing loose joists prevents future creaks and stabilizes your flooring.
Methods to Secure the Joists
Secure loose joists by adding metal brackets or sistering new joists alongside existing ones for added support. Use nails or screws specifically designed for framing to ensure a tight hold. For a more permanent fix, consider installing additional blocking between joists.
In some cases, shimming the joists with wood or composite shims can eliminate movement. Remember, proper tightening significantly reduces the chances of future creaks and prolongs the life of your flooring.
Ensure your repairs meet local building codes, especially in 2025, when construction standards are increasingly strict for safety and durability.
3. Apply Specialized Adhesives
Choosing the Right Adhesive
Advanced wood adhesives designed specifically for flooring can be highly effective in fixing creaky floors. Look for products that provide strong bonding and flexibility to accommodate wood expansion and contraction, which are common in fluctuating climates of 2025.
Polyurethane-based adhesives or construction glues work well for bonding loose boards and securing joists. Applying these adhesives in between problematic areas can create a solid, squeak-free surface.
Before application, ensure the surfaces are clean and dry to maximize adhesion. Follow the manufacturer’s instructions carefully for best results.
Proper Application Tips
Apply adhesive using a caulking gun directly into gaps or under loose boards. Clamp or weight the boards down until the glue cures, which typically takes 24 hours. In 2025, some adhesives cure faster with innovative catalysts, reducing downtime.
This method is minimally invasive and can restore stability without extensive structural modifications. Routine use of adhesives can be a cost-effective way to fix creaky floors in older homes or flats.
Regularly inspecting adhesive bonds ensures your floors stay quiet and stable long-term.
4. Install Shims for Stability
Identify Areas Needing Shims
Shims are thin wedges used to fill gaps and stabilize uneven framing. They are particularly useful when floors are sagging or squeaking because of misaligned joists or warped wood. Walk around your room to find uneven spots or noticeable creaks during movement.
In 2025, 3D scanning tools can give detailed maps of floor levelness, helping pinpoint exactly where shims should be placed for optimal support.
Proper identification of shim placement is crucial to effectively eliminate creaky sounds and prevent future issues.
How to Properly Install Shims
Insert shims between the joist and subfloor, ensuring a tight fit. Use wood shims for ease and adjustability, or composite shims for long-term durability. Tap gently with a hammer until the surface is level and secure.
Re-securing floorboards after shimming prevents movement that causes noise. Be cautious not to over-shim, as excessive pressure can damage the wood.
Shimming is a straightforward and affordable method for fixing creaky floors without extensive remodeling.
5. Reinforce with Additional Framing
Adding Support Beams
If your floors are heavily creaky or sagging, supplement your existing framing with support beams or cross-bracing. This helps spread weight evenly and stabilizes the structure.
In 2025, engineered wood products like LVL beams offer high strength and longevity, making reinforcement more durable and less invasive.
Reinforcing framing can be a game-changer for older homes with compromised joist systems, significantly reducing creaking and preventing future structural damage.
Cost and Implementation Considerations
While adding reinforcement involves some work and expense, it provides long-term stability. Consult a structural engineer or a professional carpenter to design the best reinforcement plan for your home.
Proper reinforcement not only fixes the immediate issue of fixing creaky floors but also enhances overall safety and resale value.
In 2025, increasingly sustainable materials are preferred for eco-friendly home upgrades.
6. Use Floor Silicones or Lubricants
Applying Lubricants to Reduce Noise
For minor squeaks, applying silicone-based lubricants into the cracks can drastically reduce noise. Spray or insert the lubricant into the gaps between boards or around nails where squeaks originate.
In 2025, low-VOC and eco-friendly lubricants are readily available, making this method safe for families and the environment.
This quick fix is perfect for temporary relief and can help to prolong the time before more extensive repairs are necessary.
Preventative Maintenance
Regular application of lubricants can prevent creaking from worsening over time. Consider a seasonal maintenance routine to keep your floors quiet and smooth.
Additionally, using lubricants helps reduce friction that causes creaks, especially in homes with wooden floors exposed to humidity changes.
Combining this technique with other fixing methods can give your floors a longer lifespan and help avoid costly repairs later on.
7. Replace Old or Worn Floorboards
Identifying Worn Boards
Over time, floorboards can degrade, warp, or develop rot, all of which contribute to creaking. Look for cracked, splintered, or uneven boards during your inspection.
In 2025, digital moisture meters can help detect hidden damage beneath the surface, aiding in accurate replacement decisions.
Replacing heavily damaged boards not only fixes the squeak but also improves the overall appearance and safety of your flooring.
Best Practices for Replacement
Remove damaged boards carefully, preserving the subfloor when possible. Measure and install new boards that match your existing flooring style and thickness.
Secure new boards with appropriate nails or staples, and finish with smoothing or sanding to ensure a flat, squeak-free surface. Using high-quality, durable materials guarantees a longer-lasting fix.
This approach is especially suitable for older homes where other fixing methods may no longer be effective.
8. Level Uneven Floors
Determining Floor Unevenness
Uneven floors can cause creaking due to shifting and stress on the framing. Use a straightedge or laser level to assess the degree of unevenness.
In 2025, new level-tracking apps help homeowners measure and record their floors’ flatness, making repairs more precise.
Once identified, addressing unevenness is crucial to fixing creaky floors effectively.
Tools and Techniques for Leveling
Self-leveling compounds or underlayment systems can help correct minor unevenness. For significant deviations, installing shims or sistering additional joists may be necessary.
Ensure proper curing and sealing after leveling to prevent future movement. A level floor not only reduces creaking but also enhances the comfort and safety of your home.
In 2025, innovative materials and methods make floor leveling faster and more effective than ever before.
9. When to Hire Professionals
Assessing the Need for Expert Help
While many fixing creaky floors can be DIY, certain issues require professional expertiseâespecially structural concerns or extensive damage. If your inspections reveal compromised joists or large-scale warping, consider hiring specialists.
In 2025, home automation and remote consultation enable quick assessments by experienced professionals, saving you time and reducing risks.
Knowing when to call in experts ensures the safety, durability, and value of your home are preserved.
Choosing the Right Contractor
Look for licensed, insured contractors with experience in flooring repair. Read reviews and ask for references to guarantee quality work. An expert can recommend the most effective solutions, whether it involves fixing creaky floors or structural reinforcement.
While hiring professionals may involve higher upfront costs, their work ensures long-term stability and value. Always request detailed estimates and guarantees.
Proper professional intervention often results in a quiet, safe, and well-maintained home in 2025 and beyond.
10. Ongoing Maintenance Tips
Regular Inspection and Upkeep
Preventing creaky floors from returning involves regular inspections every 6-12 months. Keep an eye out for new squeaks or movement, and address small issues promptly.
In 2025, smart sensors can monitor vibration levels and alert you to developing problems, making maintenance more proactive.
Maintaining humidity levels, avoiding excessive moisture, and using protective pads under furniture will also prolong your floorsâ lifespan.
Long-Term Solutions
Consider upgrading your flooring with engineered or laminate options that are more resistant to squeaking and warping. Regular refinishing can also restore smoothness and quietness.
Implementing these best practices ensures your home remains comfortable and noise-free, saving you money and stress in the future.
Fixing creaky floors is an ongoing effortâstaying proactive with maintenance guarantees a stable, peaceful home for years to come.
Frequently Asked Questions
1. How can I identify the source of fixing creaky floors?
Start by inspecting visually for loose boards, then walk slowly to listen for creaks. Using a flashlight and tools like a moisture meter or infrared camera can help locate hidden issues.
2. Whatâs the most effective method to fix fixing creaky floors permanently?
Combining methods like tightening joists, adding supports, and replacing worn boards provides a durable solution. Professional reinforcement offers the best long-term fix.
3. Can I fix creaky floors myself in 2025?
Yes, many fixes like shimming, tightening, or applying adhesives are DIY-friendly, especially with modern tools. However, complex structural issues should be handled by professionals.
4. How much does repairing creaky floors typically cost?
Costs vary depending on the extent of damage. Basic fixes may be under $200, while extensive reinforcement or replacement can run over $1000. Investing in proper repair prevents future costly problems.
5. Why is fixing creaky floors important in 2025?
Addressing creaks improves home safety, comfort, and value. With advanced tools and materials available in 2025, fixing creaky floors has become more efficient and long-lasting.
Conclusion
Fixing creaky floors is essential for maintaining a safe, quiet, and comfortable home. With the strategies outlined for 2025âfrom inspecting and tightening to reinforcement and professional helpâyou can effectively eliminate unwanted noise and structural issues. Remember, addressing the problem early saves money and preserves your home’s value. By following these proven methods, you’ll enjoy a more peaceful living environment for years to come.