- 1. Identify the Cause of the Leak
- 2. Turn Off the Water Supply Correctly
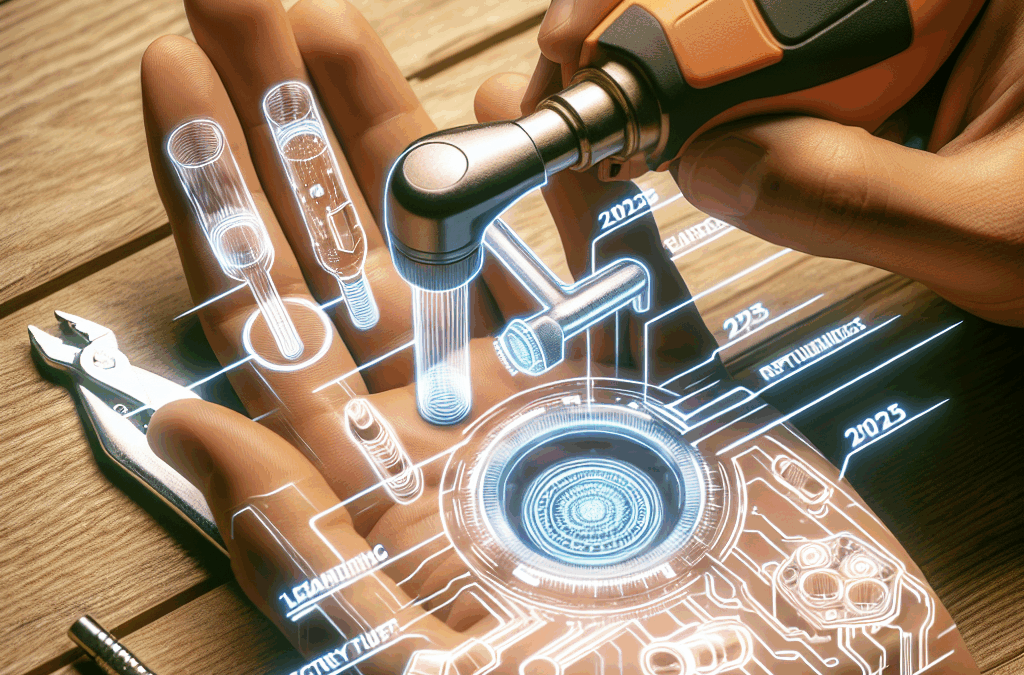
- 3. Gather Proper Tools and Replacement Parts
- 4. Disassemble the Faucet Carefully
- 5. Inspect and Replace Worn-Out Components
- 6. Replace the Washer or O-Ring
- 7. Check and Tighten all Connections
- 8. Reassemble and Test the Faucet
- 9. Prevent Future Leaks with Regular Maintenance
- 10. When to Call a Professional Plumber
1. Identify the Cause of the Leak
Understanding Common Leak Sources
Before you dive into repairs, it’s crucial to identify what’s causing your leaky faucet. Common causes include worn-out washers, corroded O-rings, loose fittings, or damaged cartridges. Recognizing the source helps you choose the right repair tips for a lasting fix.
In 2025, new sensor-based faucets have become popular, and detecting leaks might also involve checking electronic components. However, traditional leaks often stem from mechanical parts that wear over time. Taking a few moments to observe when the drip occurs can save you time and money.
For example, if your faucet drips constantly, it often indicates a worn washer or O-ring. If the leak only happens when the faucet is turned on or off, a loose connection could be the culprit. Identifying the cause is the first step towards effective leaky faucet repair tips.
Tools for Diagnosing Leaks
Using simple tools like a flashlight, mirror, or even a stethoscope can help pinpoint the leak source. For precision, check the valve seat, cartridge, and seals thoroughly. Modern digital moisture meters can also detect hidden leaks behind walls.
Keep a small notepad to record your observations. Noting when the leak occursâsuch as during use or at restâcan inform which leaky faucet repair tips will be most effective. In 2025, smart plumbing diagnostics are gaining popularity, providing real-time leak alerts directly to your phone.
Always remember, thorough diagnosis can prevent unnecessary part replacements, making your leaky faucet repair more efficient.
2. Turn Off the Water Supply Correctly
Shutting Off the Main Water Line
Nothing ruins a quick repair more than water spraying everywhere because of an improperly turned-off supply. For most faucet repairs, shut off the main water supply to prevent flooding. Locate the main valveâusually found near the water meter or in the basementâand turn it clockwise.
In 2025, smart home water shutoff systems allow remote control, making it easier to manage water flow during repairs. If your home has such a system, ensure it’s activated before beginning repairs.
After turning off the main supply, open your faucet to drain residual water from the pipes. This step minimizes water spillage and keeps your workspace dry, enabling a safer, more effective repair process.
Turning off Local Valves for Specific Faucets
If your home has localized shutoff valves for individual fixtures, use these instead of the mainline. These valves are usually located beneath the sink. Turn them clockwise to shut off water to that particular faucet.
Using local shutoff valves reduces inconvenience, especially if you still need water elsewhere in your home. Regularly testing and maintaining these valves ensures they operate smoothly when needed, which is a helpful leaky faucet repair tip for homeowners.
Always double-check that the faucet has no water pressure before beginning work to prevent accidental leaks or spray during disassembly.
3. Gather Proper Tools and Replacement Parts
Essential Tools for Faucet Repair
Having the right tools saves time and prevents damage during fixes. Common tools include an adjustable wrench, Phillips and flat-head screwdrivers, pliers, Allen wrenches, and a utility knife. In 2025, digital torque wrenches are also useful for precise tightening.
Additionally, a flashlight, towel, and small container for storing screws and small parts are invaluable. Avoid using makeshift tools that can strip or damage delicate components.
Investing in a quality toolkit designed for plumbing repairs makes future leaky faucet repair tips easier to implement and more effective.
Replacement Parts Checklist
Ensure you have the correct replacement parts on hand, such as washers, O-rings, cartridges, or seals. Bringing your old parts to the store or checking model numbers online can ensure compatibility.
In 2025, many manufacturers offer upgrade options that are more durable and leak-resistant. Upgrading to these parts can make your leaky faucet repair last longer, saving you money and water in the long run.
Having these parts ready before starting the repair process streamlines the experience and minimizes downtime.
4. Disassemble the Faucet Carefully
Step-by-Step Disassembly
Start by removing the handle. Use the appropriate screwdriver or Allen wrench, depending on the faucet model. Carefully keep all screws and small parts organized to avoid losing any components.
Next, disassemble the valve or cartridge, following manufacturer instructions. Take photos during each step to help with reassembly. Moving slowly and patiently ensures no parts are damaged or misplaced.
In 2025, digital manuals and QR code instructions are increasingly available, making disassembly more straightforward and less error-prone. Take advantage of these resources to familiarize yourself with your specific faucet model.
Avoid Common Mistakes
Many DIYers accidentally cross-thread fittings or over-tighten components, causing future leaks. Use gentle, steady pressure when removing parts, and replace any damaged or corroded components with new, manufacturer-approved replacements.
Ensuring proper disassembly lays the groundwork for effective leaky faucet repair tips. Rushing the process often leads to more significant issues down the line.
Remember, patience and careful handling are key to restoring your faucet to leak-free operation.
5. Inspect and Replace Worn-Out Components
Checking for Damage and Wear
Examine washers, O-rings, and cartridges closely for cracks, corrosion, or deformation. In 2025, high-tech materials like silicone and composite plastics offer increased durability, making replacement more effective.
Replace any worn or damaged parts as soon as possible. Even small cracks can cause significant leaks over time, wasting water and increasing your utility bills.
Remember, a small investment in quality replacement parts now can save you from more extensive repairs later.
Proper Installation Techniques
Ensure that new components are seated correctly and aligned properly. Use a torque wrench if available, to tighten fittings to manufacturer specifications. Over-tightening can damage parts, while under-tightening can cause leaks.
In 2025, some modern fixtures include self-aligning components that make installation foolproof. Follow your specific product instructions carefully to ensure a leak-proof fit.
Once replaced, double-check all connections before reassembling fully, to guarantee the longevity of your repair.
6. Replace the Washer or O-Ring
Why These Parts Matter
Worn washers and O-rings are the leading causes of dripping faucets. These small but critical parts form a seal that prevents water from escaping. In 2025, high-quality rubber materials resist wear and chemical degradation better than ever.
Replacing these components is often the most straightforward and cost-effective leaky faucet repair tip. Regular replacement can extend the lifespan of your faucet significantly.
Check your existing washers and O-rings for signs of cracking or flattening, and replace them immediately if needed.
Step-by-Step Replacement Process
Remove the old washer or O-ring using pliers or a flat-head screwdriver. Clean the seat area thoroughly to ensure a proper seal with the new part. Install the new washer/O-ring, aligning it correctly to avoid misfitting or leaks.
Ensure that the replacement parts are made from compatible, high-quality materials to withstand the test of time in 2025’s water conditions.
Proper replacement of washers and O-rings is one of the most effective leaky faucet repair tips, ensuring a tight seal and preventing further drips.
7. Check and Tighten all Connections
Ensuring a Secure Fit
Loose fittings often cause leaks. After reassembling your faucet, go around all connections and tighten them gently with the appropriate tools. Avoid over-tightening, which can crack components or strip threads.
In 2025, some fittings feature quick-connect systems that simplify tightening and securing, reducing the risk of leaks.
Periodically inspecting and tightening connections as part of regular maintenance can prevent future leaks, saving you time and money.
Signs of Loose Connections
If you notice water seeping around joints or fittings during use, it’s a sign to tighten. Additionally, frequent vibrations or noises indicate that fittings may need securement.
Always turn off water before tightening fittings to avoid accidental sprays and ensure safety during repairs.
Implementing this leaky faucet repair tip guarantees a more reliable and long-lasting seal around your fixtures.
8. Reassemble and Test the Faucet
Careful Reassembly Steps
Follow your photos or notes to reassemble the faucet parts in reverse order. Make sure all screws and nuts are tightened securely but not over-tightened. Ensure that parts align perfectly to prevent future leaks.
In 2025, some faucets now include built-in sensors that require specific reassembly procedures, so consult your product manual if available.
A proper reassembly is crucial for the success of your leaky faucet repair tips. Double-check all connections and components before proceeding to testing.
Testing for Leaks
Turn the water supply back on slowly, and watch for leaks. Observe around the fittings, handle, and spout for drips or sprays. Open and close the faucet multiple times to ensure it operates smoothly without leaks.
If you notice continued dripping, revisit the previous steps to identify and fix any issues. Sometimes, a small readjustment can resolve persistent leaks effectively.
Performing thorough testing guarantees your repair is successful and that your faucet remains leak-free in 2025.
9. Prevent Future Leaks with Regular Maintenance
Scheduling Routine Checks
Regular inspections can prevent small issues from becoming major leaks. In 2025, smart leak detection systems send alerts to your phone, enabling proactive maintenance.
Check for signs of wear, corrosion, or loose fittings every few months. Replacing aging parts early extends the life of your faucet and conserves water.
Implement simple maintenance tasks like cleaning aerators and replacing washers periodically, following leaky faucet repair tips for longevity.
Adopting Water-Saving Habits
Reducing water flow and avoiding over-tightening fixtures can minimize stress on faucet components. Install water-efficient aerators to decrease pressure and prolong component life.
In 2025, eco-friendly fixtures combined with smart monitoring make it easier to maintain leak-free plumbing and promote sustainability.
Keeping your plumbing system well-maintained helps prevent leaks and ensures your faucet functions optimally for years to come.
10. When to Call a Professional Plumber
Signs That Require Expert Help
If you’ve tried the best leaky faucet repair tips but still face persistent leaks, itâs time to consult a professional. Complex issues involving internal valves or water pressure problems often need specialized tools and expertise.
In 2025, advanced plumbing diagnostics can detect hidden leaks behind walls or in underground pipes, surpassing DIY capabilities.
Additionally, if your faucet system is integrated with a smart home setup, a licensed plumber with experience in smart plumbing is advisable for a safe and proper repair.
Benefits of Professional Repairs
Professional plumbers ensure a thorough diagnosis, correct installation, and durable fixes, reducing the risk of future leaks. Their expertise can also prevent accidental damage to your plumbing system.
Investing in professional services for complex leaks saves money and hassle in the long run, especially with the evolving technology of 2025.
Remember, while many leaky faucet repair tips can be DIY-friendly, some issues are best left to the experts for peace of mind.
Frequently Asked Questions
- What are the most common leaky faucet repair tips for 2025?
- Key tips include replacing worn washers and O-rings, tightening fittings, checking internal components, and performing regular maintenance to prevent leaks.
- How can I tell if my leaky faucet needs professional repair?
- If you’ve tried all basic fixes and the leak persists, especially with complex valve or cartridge issues, calling a licensed plumber is recommended.
- Are modern faucets easier to repair with leaky faucet repair tips?
- Yes. Many new fixtures designed in 2025 incorporate self-sealing technology and modular parts, making DIY repairs simpler and more reliable.
- What are some cost-effective ways to fix a leaky faucet in 2025?
- Replacing washers and O-rings, tightening fittings, and performing routine maintenance are inexpensive but effective leaky faucet repair tips.
- Can regular maintenance prevent leaks?
- Absolutely. Regular inspection and timely replacement of worn parts significantly reduce the chances of leaks developing.
Conclusion
In 2025, mastering the top 10 leaky faucet repair tips is essential for maintaining a leak-free home environment. From identifying the cause of the leak to routine maintenance, each step plays a vital role in fixing drips quickly and effectively. Applying these expert tips ensures your faucet functions smoothly, conserves water, and saves you money. Remember, if DIY efforts donât resolve the issue, consulting a professional plumber is the best move. Keep these leaky faucet repair tips in mind to enjoy a drip-free, efficient plumbing system all year round!